Country Living Grain Mill Instruction Manual
CAUTIONS:

- DO NOT operate the mill without grain in the hopper.
- DO NOT get excessive moisture on plates or bearings.
- EXCESSIVE WEAR will occur if plates are run tight against each other without grain.
- For flour, use only hard, dry beans or grains. Moist or soft beans or grains will cause clogging.
- Always remove wooden handle from flywheel before motorizing mill.
- Full liability and responsibility for complying to all Federal, State, and Local Safety Standards is assumed by any person or persons who modify or motorize the Country Living Grain Mill in any way. Motorized mills should be operated by adults only. Note: All belts and pulleys not driven by hand should be enclosed for safety.
ASSEMBLY:
Your mill is packed in a partially assembled state. It will be necessary to finish assembly before attempting to process any grains. A drawing is provided to clarify part description and location.
Remove the mill housing and mount it upright on a stable work surface using 5/16” bolts or the Country Living Counter Clamp. The flywheel is packed in the side of the box. It should be installed by slipping it on the shaft protruding from the rear of the mill, and over the long key which should be fitted into the slot on that same shaft. Hold the flywheel in place by tightening the set screw in the hub with the hex wrench provided. The hub of the flywheel should be facing inward toward the grain mill.
The handle assembly threads into the hole located in the outside edge of the flywheel until it stops. It can then be held in place by tightening the nut against the flywheel with a 9/16" wrench (not provided). The wood handle should spin freely on the bolt after installation. If it does not, loosen the nut and back the bolt away from the flywheel 1/4 turn, then re-tighten the nut against the wheel. CAUTION: if the handle is too loose, it may pinch skin during use.
Your mill is now ready for operation. Please refer to this manual for full operation instructions.
 MOUNTING:
The mill must be securely mounted to a solid base before attempting to operate. For best results the mounting surface should be attached to either the wall or floor. The mill base is pre-drilled to be easily bolted or lagged to a surface permanently with 5/16” bolts.
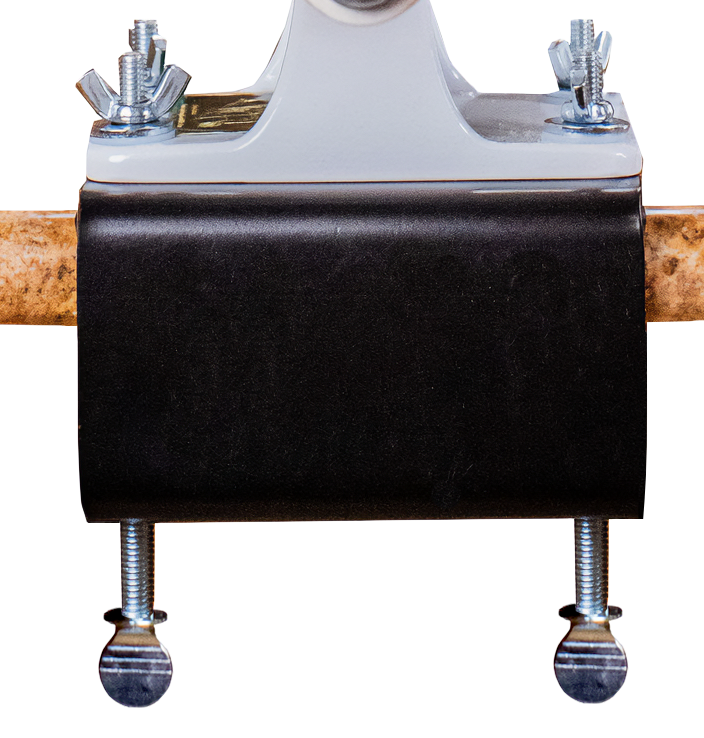
Alternatively, clamp the mill to a solid work surface. If you utilize this procedure, the mill base should be protected against possible damage to the finish. This can be done by putting something between the clamp and the mill base. The mill should be mounted at a height that is comfortable to the user. We found that if the center of the flywheel is located about waist height, we gain the best leverage.
OPERATION:
We grind wheat in every mill after assembly in order to test and adjust the grinding plates. We begin by tightening the adjustment knob until the plates are rubbing all the way around, then we pour in the grain and grind. It is much easier to begin at a finer setting and adjust out to a coarser setting. This adjustment procedure should be followed anytime the plates have been opened up or removed.
If the flour produced from this setting is not the consistency desired, it can be varied by the adjustment knob on the front of the mill. Tightening the knob will produce a finer grind. Loosening it will produce a coarse grind or "cracked" grain for cereals. Most adjustments should require only a slight turn of the knob. After each small adjustment, turn the flywheel 2 to 3 times and check the product for desired consistency. The amount of effort required to turn the flywheel will increase as the knob is tightened. It shouldn’t be increased to the point that the flywheel cannot be turned at all or requires excessive effort. Release tension by backing off the adjustment knob.
NOTE: We find that, after tightening the knob to achieve the grind desired, we can often back it off a little to relieve the effort required to turn the flywheel and still retain a desirable grade of flour.
CLEANING:
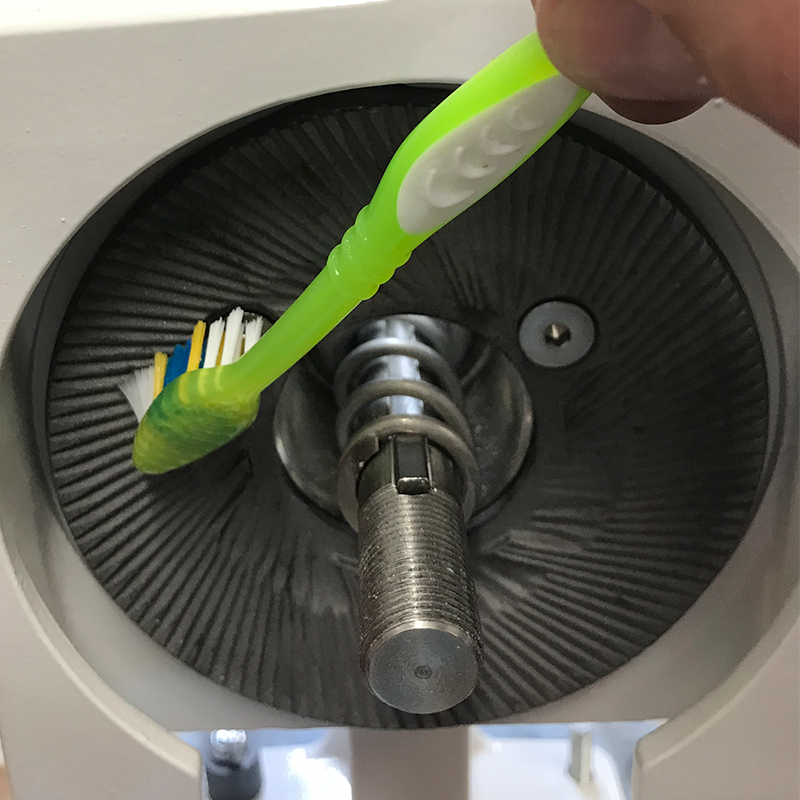 The mill is easily disassembled for cleaning by removing the adjustment knob and sliding the front plate off the shaft. BE CAREFUL not to lose the small square key that prevents the plate from spinning on the shaft. Removal of these parts allows access to the grinding surfaces of the plates. Use a small brush to clean out excess flour from corners and surfaces.
On rare occasions it may be necessary to remove and clean the grinding plates. Use the wrench provided with the mill to remove the screws holding the stationary plate to the housing. The plate may now be separated from its mounting surface for thorough cleaning. Before replacing the stationary plate, make sure that the mounting surfaces are clean and free from any foreign matter. The plate is designed to locate in one position only, so make sure that all the mounting holes line up before reinstalling. The mill housing is not designed to be submerged during cleaning. A slightly damp cloth should suffice for cleaning the housing and its parts. If the grinding plates or bearings get wet, they should be dried immediately to prevent rusting.
MOTORIZATION:
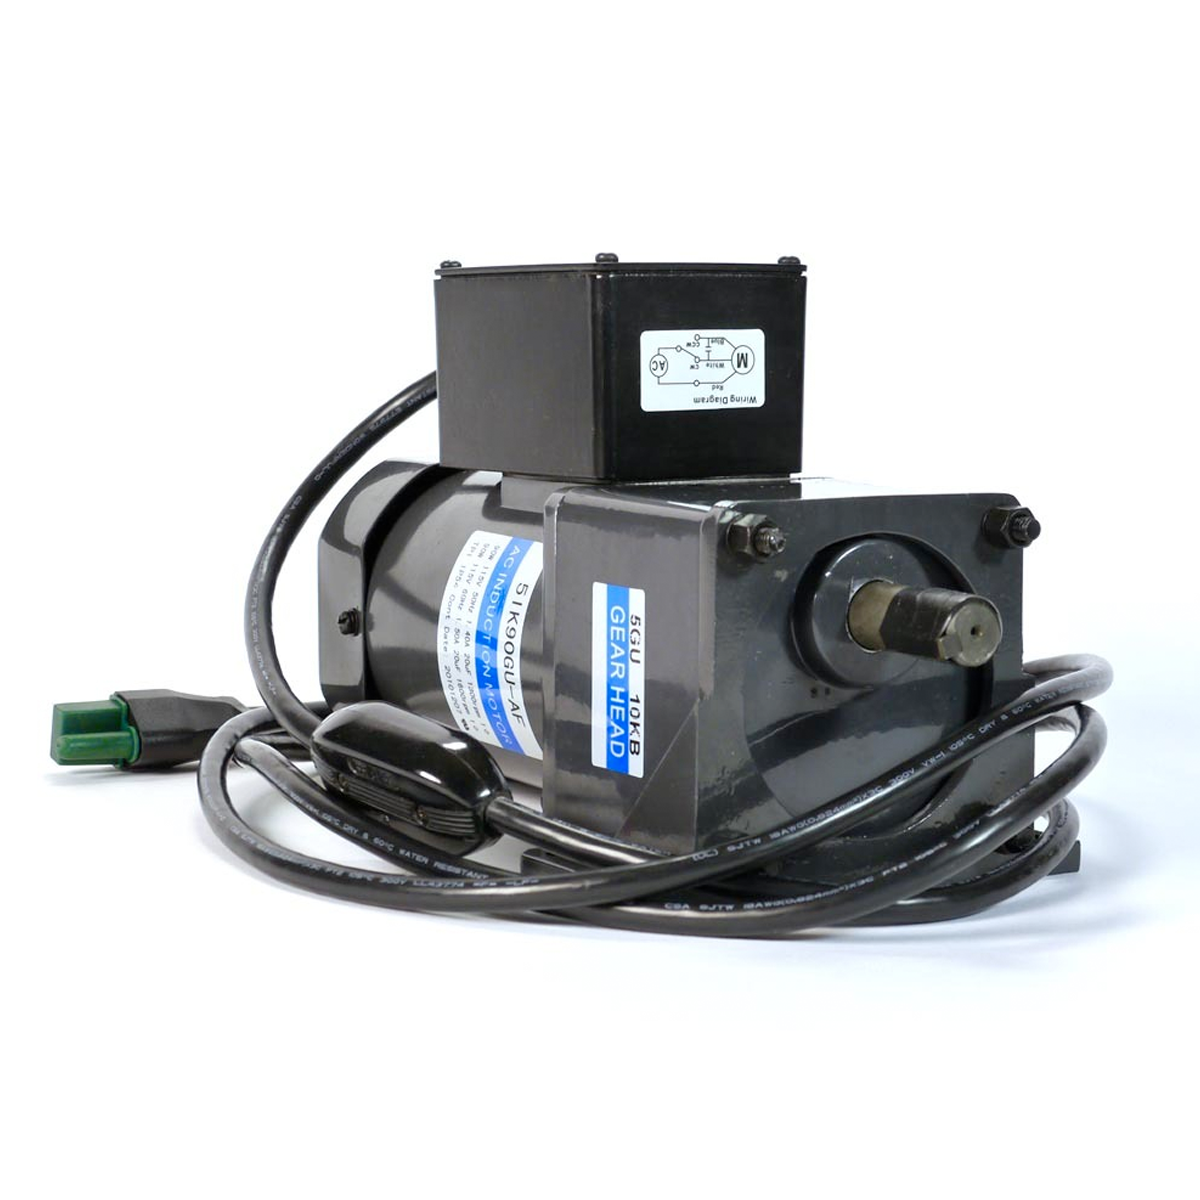 Your grain mill is designed to be easily motorized. The flywheel is grooved for use with a standard ½” A or V belt. We advise using a gear-reduced motor that will drive the mill at 75 rpm's or less.
The motor and the mill should be securely fastened to a substantial surface. The mill handle MUST be removed before motorized operation. NEVER ALLOW THE MILL TO OPERATE WITHOUT GRAIN BEING PROCESSED. Belt size may be determined by the distance the motor is mounted from the mill. Belt tension should not be excessive or bearing damage may occur. Note: Due to the many variables introduced during motorization, the warranty is void if the mill is motorized by any other method than the Country Living motorization kit.
CAUTION: Full liability and responsibility for complying to all Federal, State, and Local Safety Standards is assumed by any person or persons who modify or motorize the Country Living Grain Mill in any way. Motorized mills should be operated by adults only. Note: All belts and pulleys not driven by hand should be enclosed for safety.
Wheat and Grain Storage:
 Choose dark, hard winter or spring wheat with a 12% or higher protein content. It should be clean and high grade.
The moisture content should be 10% or less. This low moisture content aids in limiting insect contamination. Insects cannot reproduce in wheat with very low moisture content.
Metal and hard plastic buckets have proven to be most effective for grain storage. Do not store any containers directly on a concrete or dirt floor. Instead place the containers on shelves or a wood pallet. This will aid in eliminating rust and toxins which could affect the quality of your grain.
Wheat is viable (can be sprouted) for 7 years if stored properly. However it will provide enough nutrition to sustain life for much longer than that. Make certain the wheat remains dry. The most successful storage comes from rotating the supply of wheat, using the older wheat before using the newer wheat.
We would like to caution you when buying wheat to make certain the wheat is dry and has the proper protein quotient. As with all things, be a cautious shopper. If you are conscientious enough to grind your own flour, then go the extra measure and be certain the grains you are purchasing are the best grains available.